

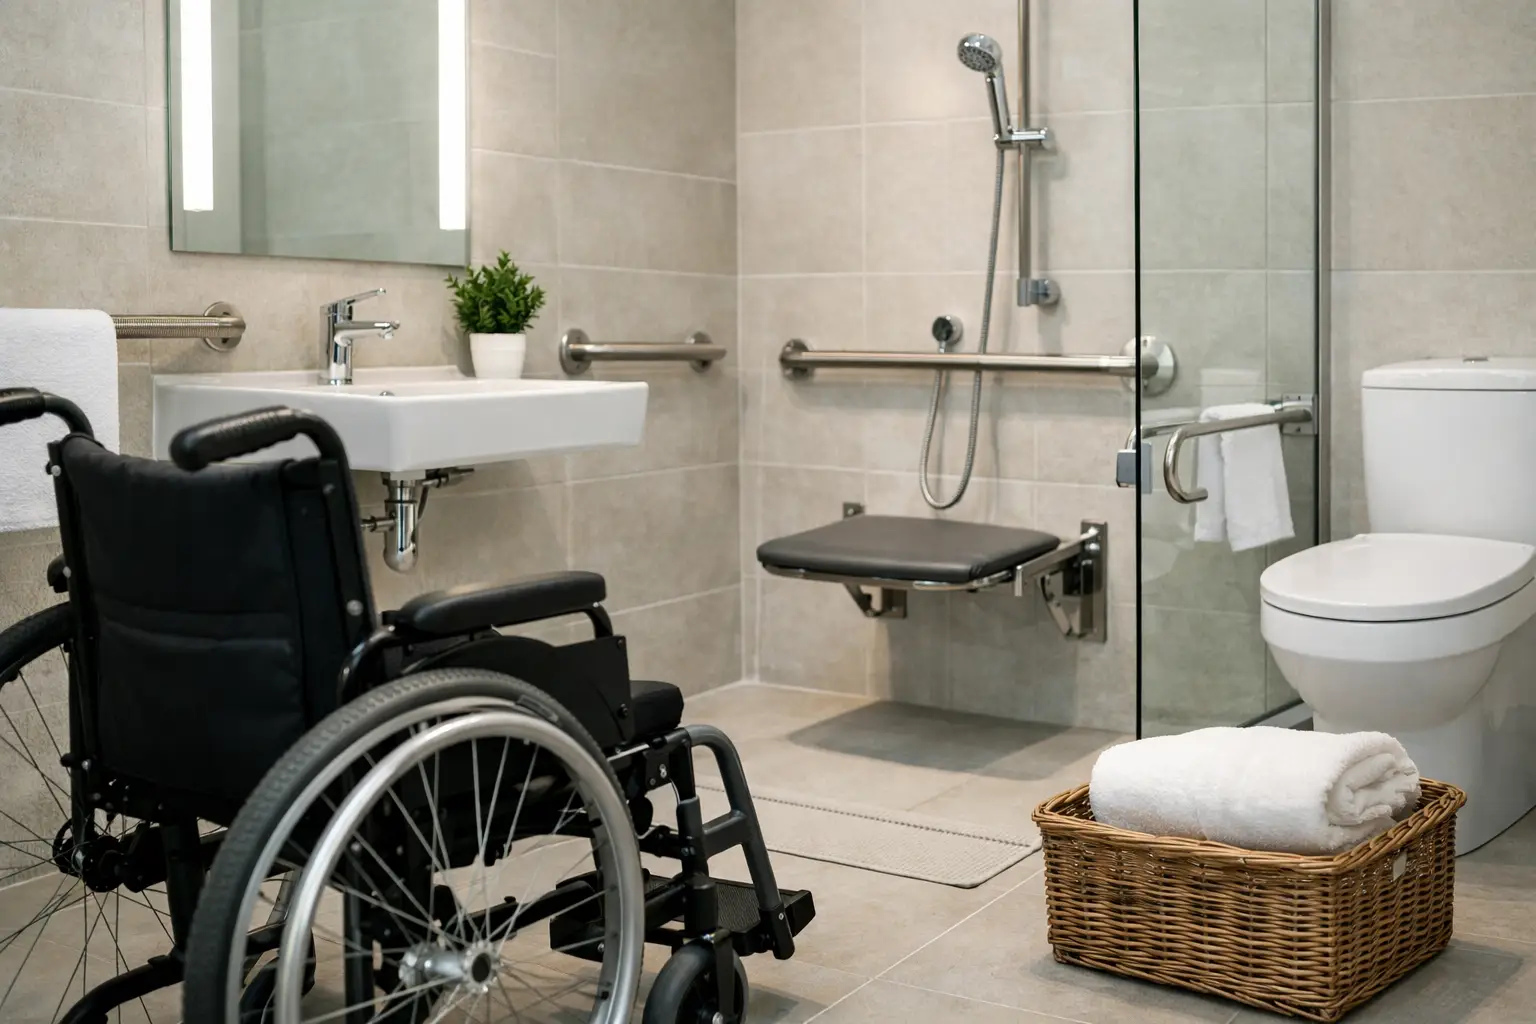
A bathroom can become difficult long before it looks outdated. A high shower step, a narrow door opening or a toilet placed too close to a vanity can turn a simple daily routine into a source of risk and frustration. Knowing how to design an accessible bathroom means planning for safe movement, practical support and everyday comfort from the beginning, without sacrificing a well-finished look.
For Sydney homeowners, this may be about helping an older parent remain at home, recovering safely after surgery, accommodating a family member with disability, or simply future-proofing a renovation. The right solution depends on who will use the room, the available space and the level of mobility required. Good accessible design is not one-size-fits-all, but it should always feel natural to use.
Start with the person, not the product
Before selecting taps, tiles or grab rails, consider how the bathroom is used now and how it may need to work in the years ahead. Is the user steady on their feet but concerned about slips? Do they use a walking frame, wheelchair or shower chair? Will a carer need room to assist? These questions shape the layout far more effectively than choosing fittings from a catalogue first.
An accessible bathroom should allow someone to enter, turn, transfer and reach essential fixtures with minimal strain. It should also reduce the need to step over edges, twist awkwardly or balance on wet surfaces. For some households, modest changes such as a walk-in shower and lever taps may be enough. For others, a complete redesign with wider circulation areas and wheelchair-friendly fixtures is the better long-term investment.
It is worth discussing individual requirements with an occupational therapist or accessibility specialist where mobility needs are significant. A licensed renovation team can then turn those practical recommendations into a coordinated bathroom plan that works within the structure of the home.
Plan a layout with clear movement space
Layout is the foundation of an accessible bathroom. A generous-looking room can still be hard to use if the toilet, shower and vanity are placed too closely together. Clear floor space is needed around key fixtures so users can move safely, use mobility aids and receive assistance when needed.
Where possible, allow a clear path from the doorway to the toilet, basin and shower. Avoid using this space for freestanding storage, laundry baskets or decorative furniture. A sliding or outward-opening door can also be useful in tighter rooms, as it avoids a door swinging into the bathroom and reduces the risk of blocking access if someone falls behind it.
Doorway width deserves close attention. A wider opening makes entry easier for a wheelchair or walking frame and feels more comfortable for anyone assisting another person. The exact dimensions should be determined by the user’s needs and the applicable Australian standards for the project, especially in commercial settings or when formal accessibility compliance is required.
Keep essential fixtures easy to reach
The toilet should have enough side clearance for safe transfers and room for support rails where needed. Positioning is particularly important because moving an existing toilet can involve plumbing changes beneath the floor. This can add cost, but it may be worthwhile if the current layout is restrictive or unsafe.
A wall-hung vanity or open-front basin gives seated users room to move closer underneath. Choose a basin depth and height that can be comfortably reached without overextending. Mirror placement matters too. A mirror that starts lower on the wall, or is angled slightly down, can work better for both standing and seated users.
Storage should be within easy reach. Deep cupboards near floor level can be inconvenient for someone with limited balance or flexibility. Drawers, pull-out organisers and open shelves at a sensible height make toiletries easier to find and reduce bending.
Make the shower step-free and secure
A step-free shower is one of the most effective accessible bathroom upgrades. It removes the high lip of a conventional shower base and creates a safer entry point for people with reduced mobility. It can also give the room a cleaner, more open appearance.
The floor must be correctly graded towards the drain so water does not travel into the rest of the bathroom. This is detailed work. Waterproofing, drainage falls and tile selection all need to be properly coordinated before the final surfaces are installed. A poorly planned walk-in shower may look good at handover but create pooling water, mould issues or slip hazards later.
A fixed glass screen can contain splashing, but it needs to be positioned carefully. In some bathrooms, an open shower zone provides easier access for a mobility aid or carer. In others, a partially screened design offers a better balance between access and keeping the floor dry. The best approach depends on room size, ventilation and how the shower will be used.
Include a sturdy shower seat if standing for a full shower is difficult. A fold-down seat saves space in compact bathrooms, while a fixed built-in bench can feel more substantial and comfortable. The wall behind any mounted seat or grab rail must be reinforced during construction, not treated as an afterthought once tiling is complete.
Choose fittings that reduce effort and risk
Small fixture choices have a major impact on daily use. Lever-style mixer taps are easier to operate than round knobs, particularly for people with arthritis or reduced hand strength. Thermostatic temperature controls can help prevent scalding, while a hand-held shower on an adjustable rail makes it easier to wash while seated or standing.
Grab rails should be selected for their purpose, not just their appearance. A properly installed rail near the toilet or in the shower provides reliable support during transfers and movement. Towel rails and vanity edges are not substitutes. They are not designed to carry body weight and can fail when someone needs them most.
To make the room safer and more comfortable, consider these practical features:
- non-slip floor tiles with an appropriate slip rating for wet areas
- a comfort-height toilet that makes sitting and standing easier
- a handheld shower with an easy-grip control
- rocker-style light switches located near the entry
- bright, even lighting around the basin, toilet and shower
Lighting is often overlooked in bathroom renovations. Shadows around the toilet or shower can make it harder to judge steps, surfaces and water on the floor. Layered lighting, including a strong general ceiling light and task lighting around the mirror, improves visibility without making the room feel clinical.
Select finishes that are safe and simple to maintain
Accessible bathrooms need finishes that stand up to moisture, cleaning and regular use. Large-format tiles can reduce the number of grout lines, which may make cleaning easier, but very large tiles are not always ideal where complex floor falls are required. Smaller tiles can follow shower gradients more effectively and offer more grout joints for traction.
Matte or textured tiles generally provide better grip than highly polished surfaces. The right choice should still suit the overall design, as overly rough tiles can be uncomfortable underfoot and harder to clean. A renovation professional can help balance slip resistance, drainage requirements and the look you want.
Create contrast between major surfaces where it assists visibility. For example, a darker toilet seat against a lighter toilet, or a contrasting grab rail against the wall, can make fixtures easier to identify. This does not mean the bathroom needs bright clinical colours. Subtle differences in tone can be enough to improve visual clarity while maintaining a calm, modern finish.
Build flexibility into the renovation
An accessible bathroom does not need to be designed only for immediate needs. Many homeowners prefer a bathroom that feels contemporary now and can be adapted later. Reinforcing walls for future grab rails, allowing extra shower space and choosing a step-free entry are sensible measures that may avoid a disruptive second renovation.
Budget also affects the scope. Replacing fittings within an existing layout is usually more affordable than relocating plumbing and rebuilding walls. However, saving money on layout at the start can be false economy if the room remains difficult or unsafe to use. A clear consultation and detailed plan help identify where spending will make the greatest difference.
For Bankstown homeowners, working with one renovation team to manage plumbing, electrical work, waterproofing, tiling, carpentry and final detailing can simplify an otherwise complex project. RADZ Renovations approaches bathroom upgrades with this coordination in mind, keeping the focus on a finished room that is practical, durable and tailored to the household.
The best accessible bathroom is one that supports independence quietly. When every surface, fitting and pathway is planned around the person using it, the room feels less like a specialised space and more like a bathroom that simply works well every day.